
Your Custom Text Here
The Front Door
Getting into it…
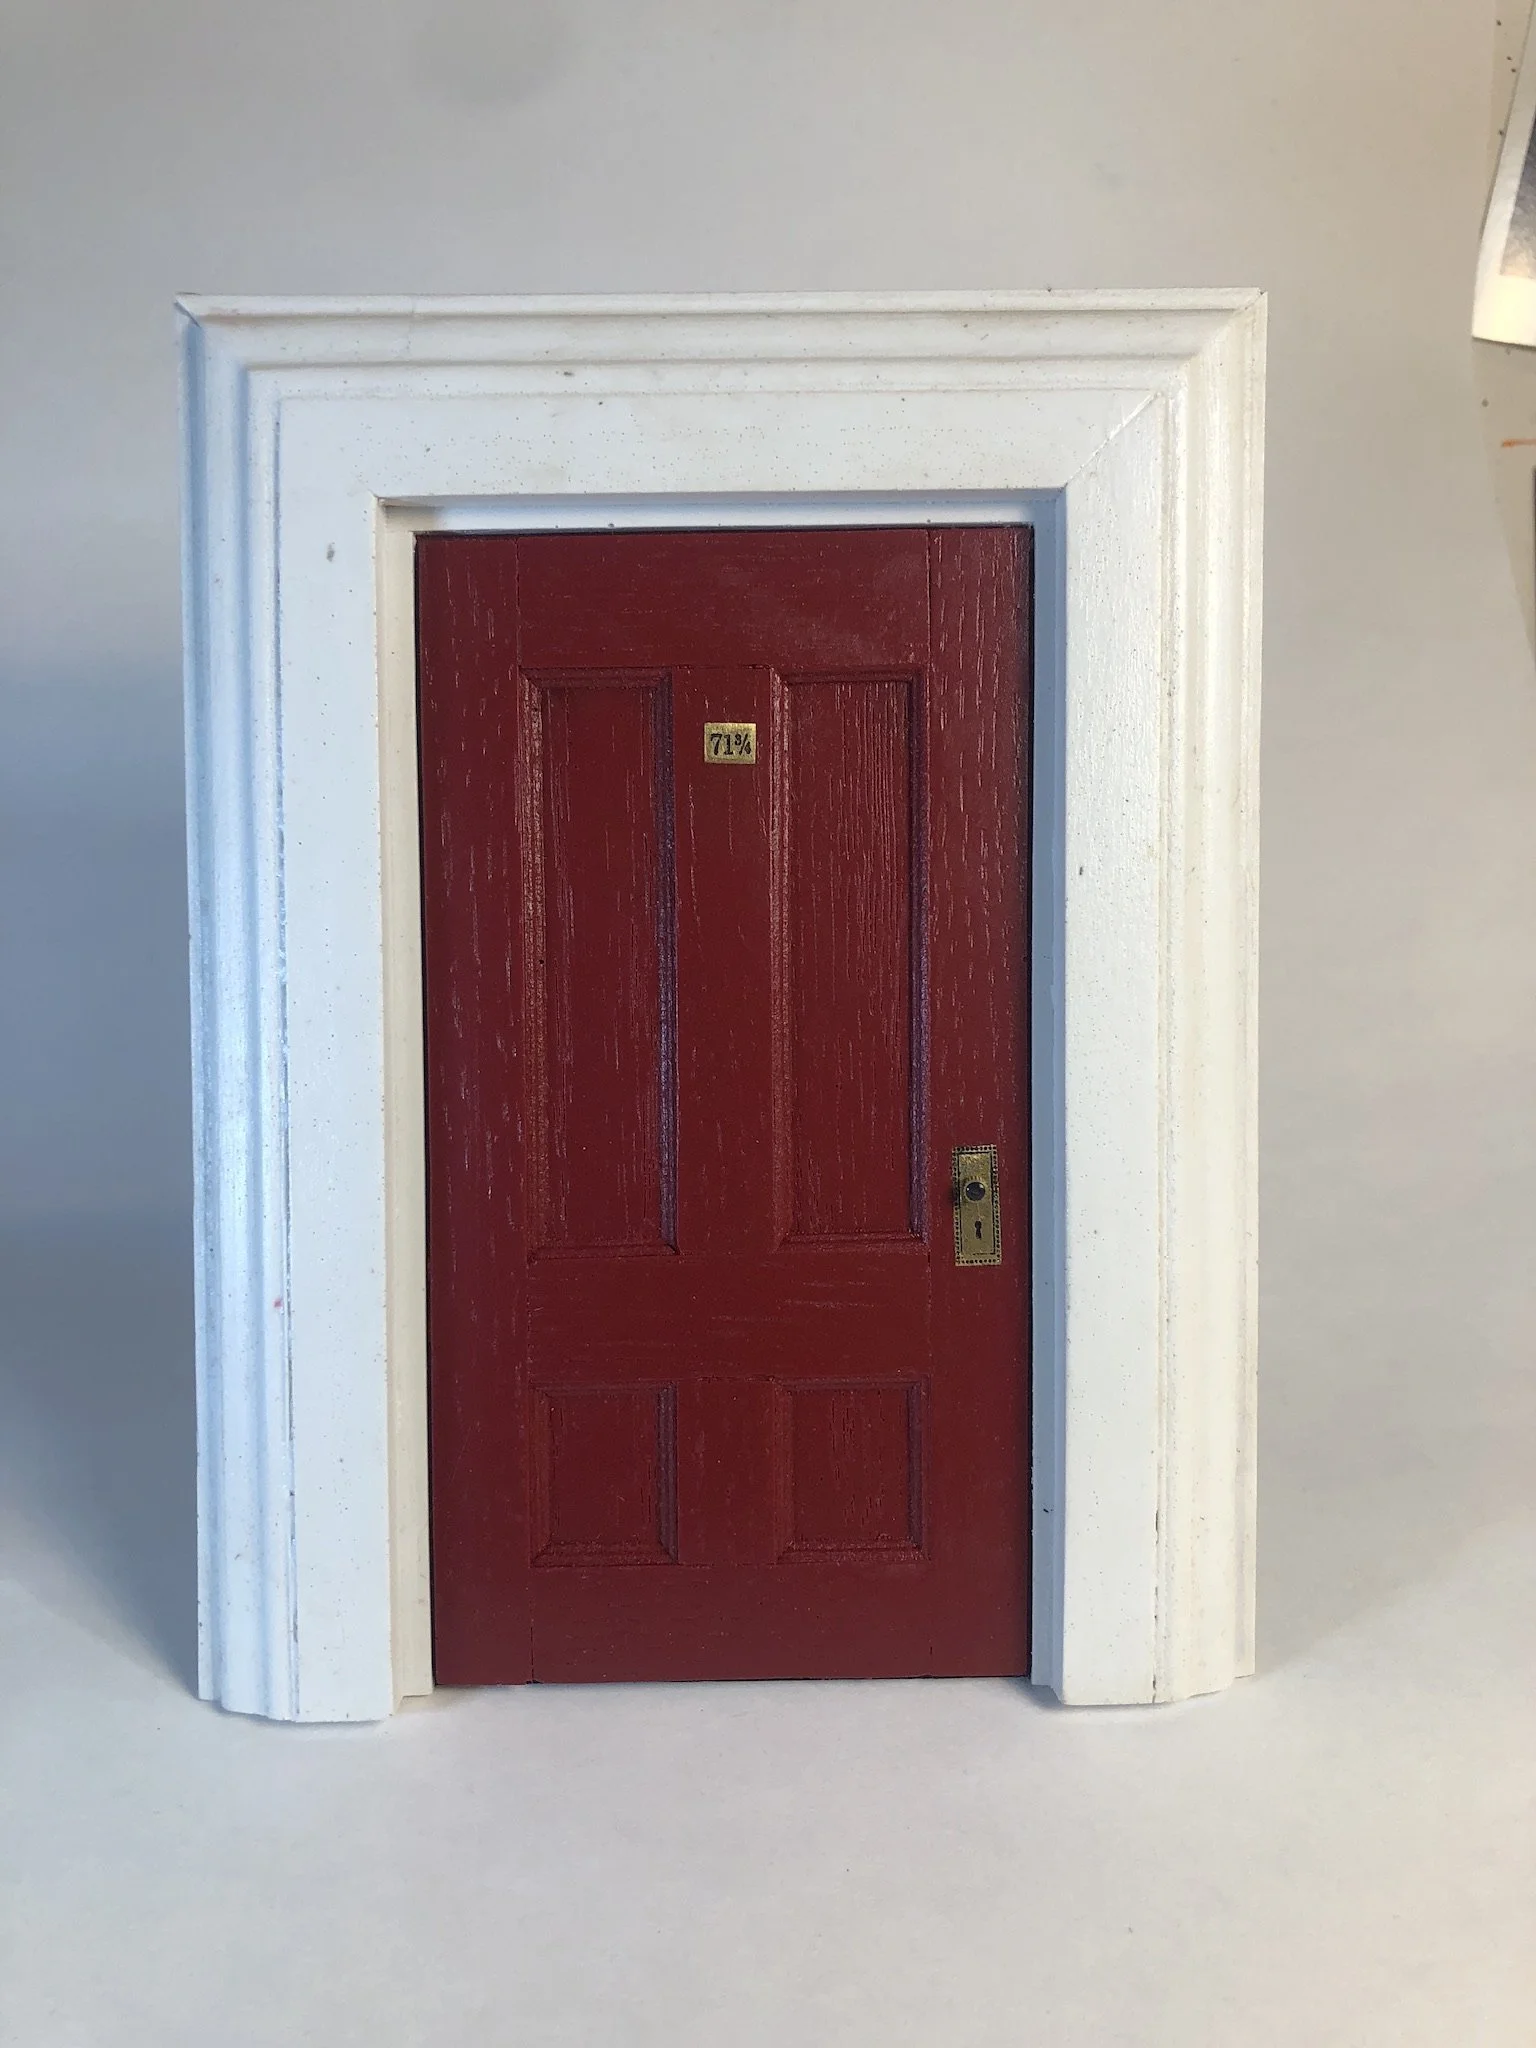
The book Paige of Beacon Hill shows a little door next to the bookstore’s main door, and there were a few problems. How do you make it relatively sturdy, so young people trying to open the door won’t break it? What if it gets scratched? How often will it need to be repainted?
My answer was to create a silicone mold, and pour a door and frame of solid epoxy, so the colors go all the way through, and shouldn’t be so obvious if the doorway gets scratched. This allowed me to also inset a brass number plate and doorknob/doorknob plate in a way that they couldn’t easily be stolen.
My first task was to build a wooden doorway that would be used to make the mold for the silicone. I wanted it to echo the full-sized door, and that meant it needed tiny mouldings. I created these by filing a “scratch stock” in a scraper blade, then passing a strip of maple across it many times until the blade had scraped the wood into a tiny moulding profile.
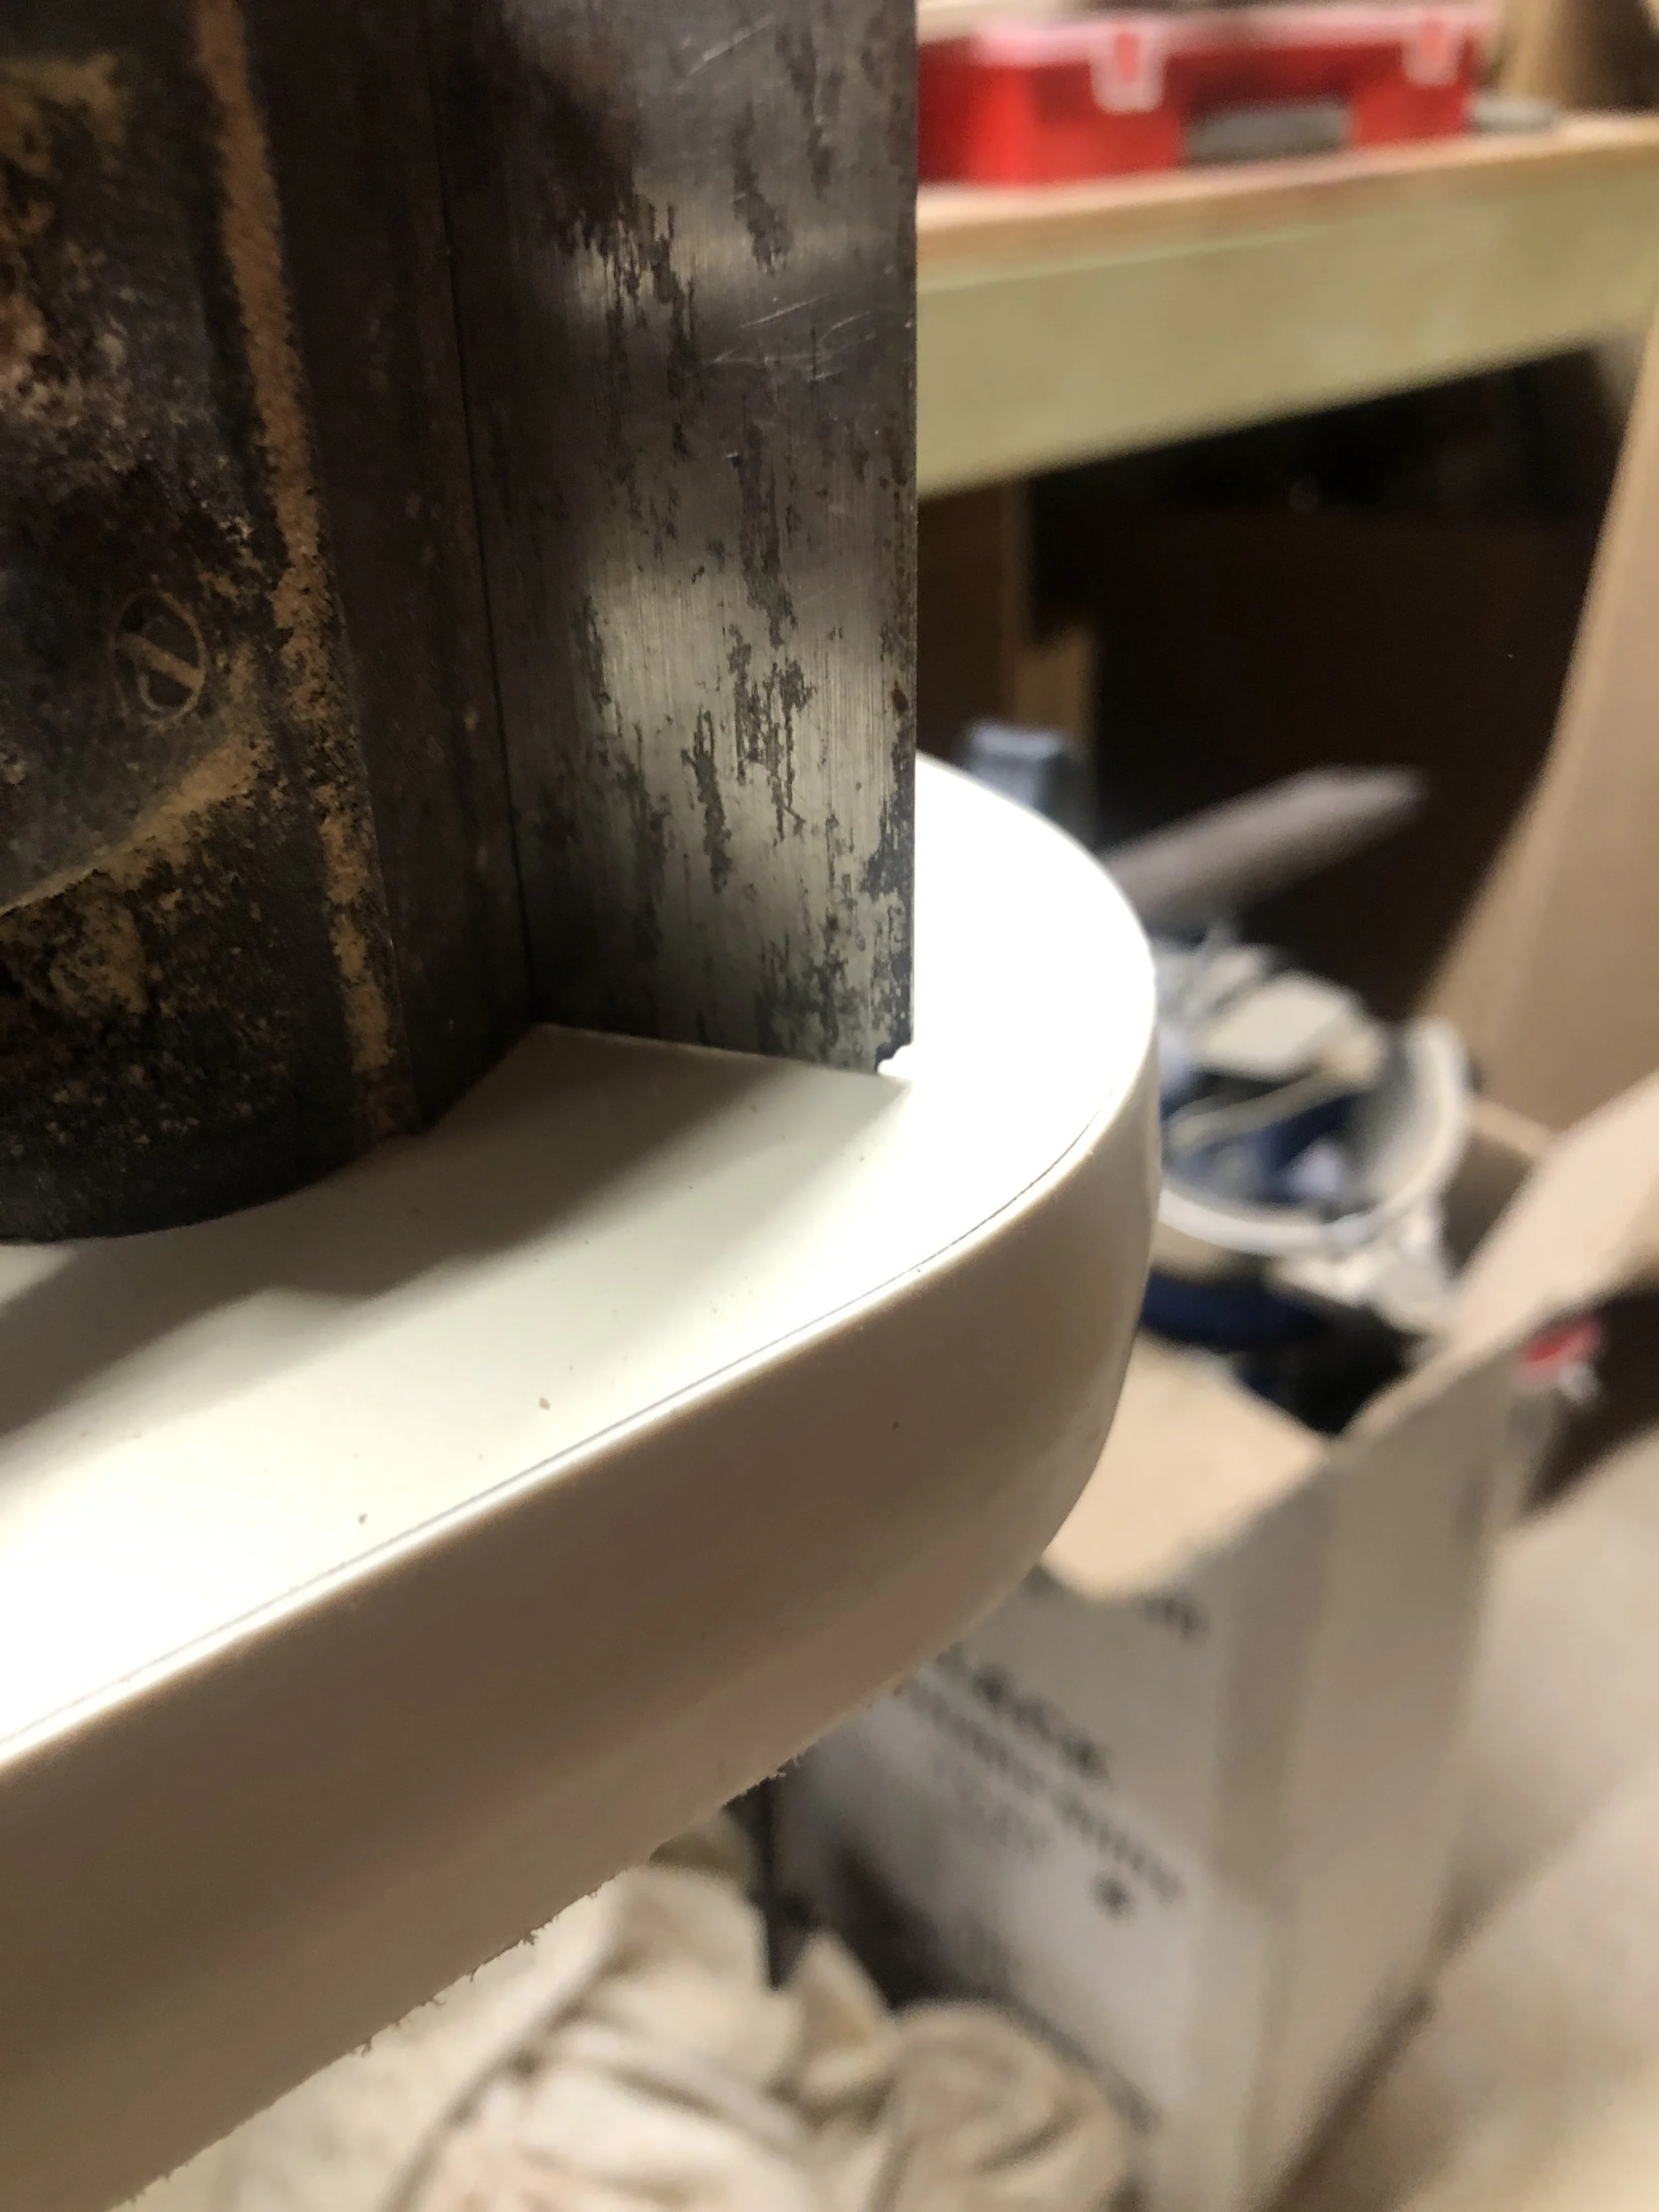
See that tiny little notch in the corner of that piece of steel? That’s the final contour of the little moulding I’m making. I pull a piece of wood against it again, and again, and again (see below)…
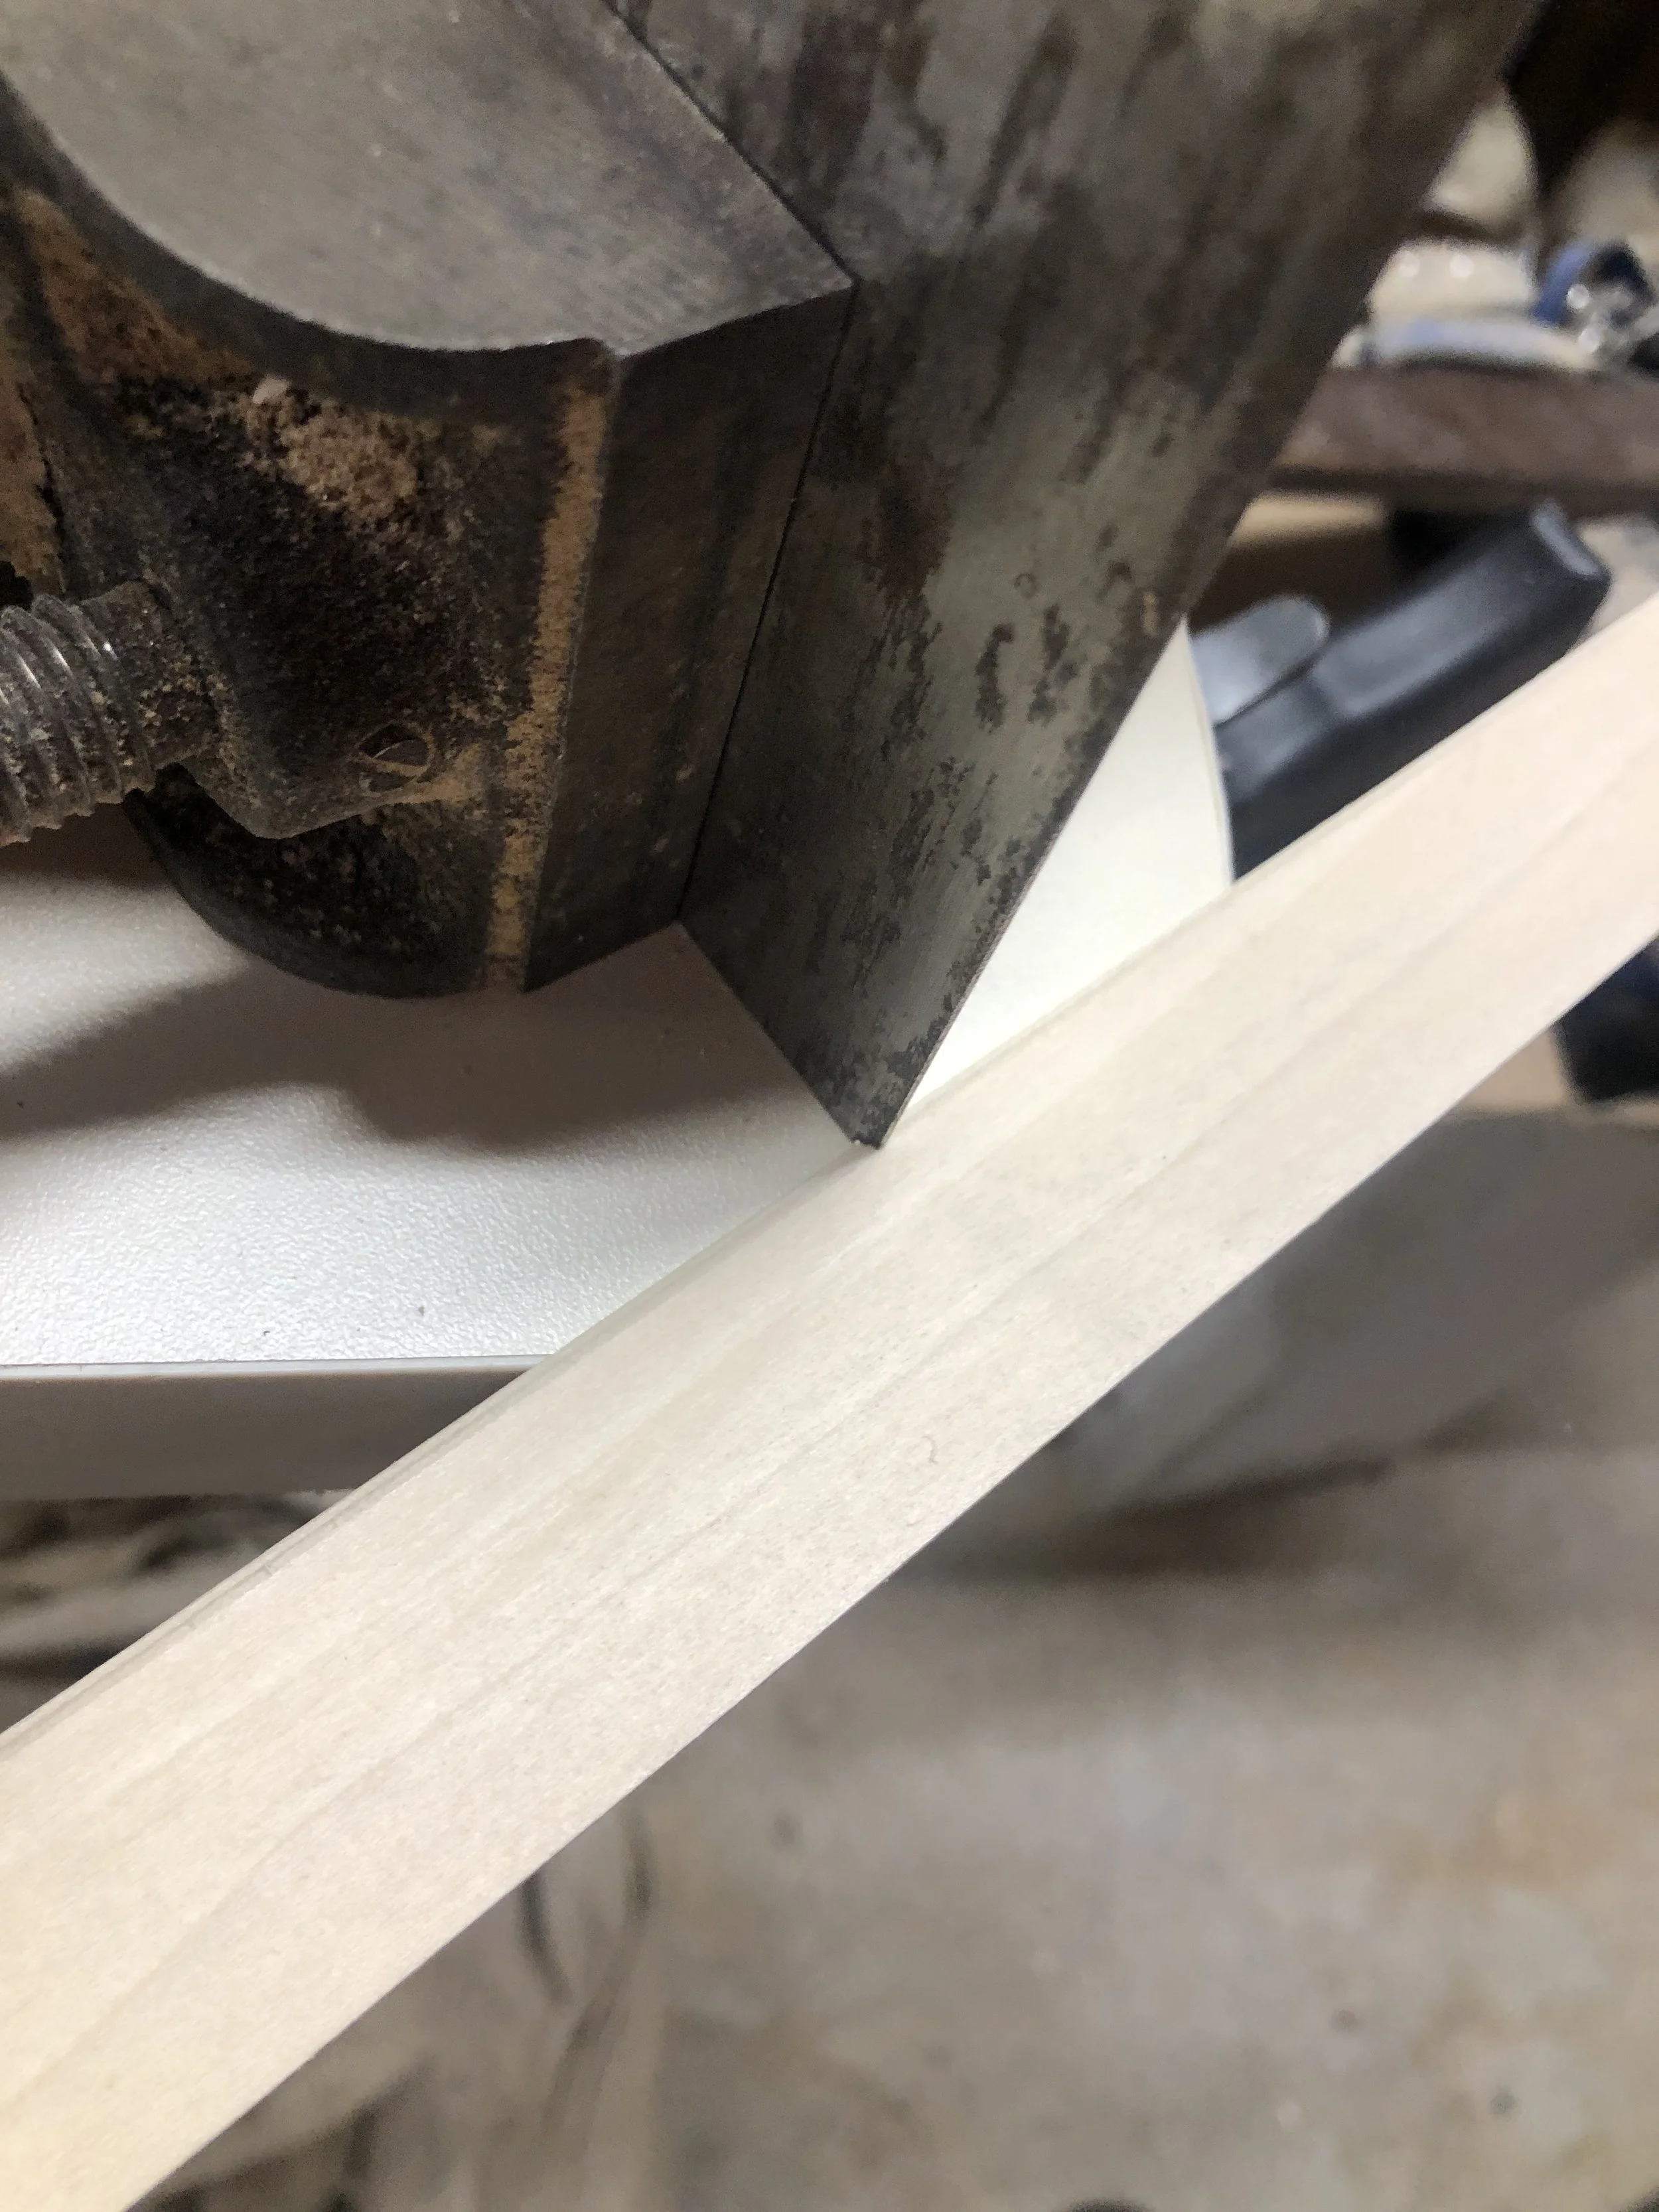
…until it’s the shape I want. Then I trim off that thin little sliver. . .
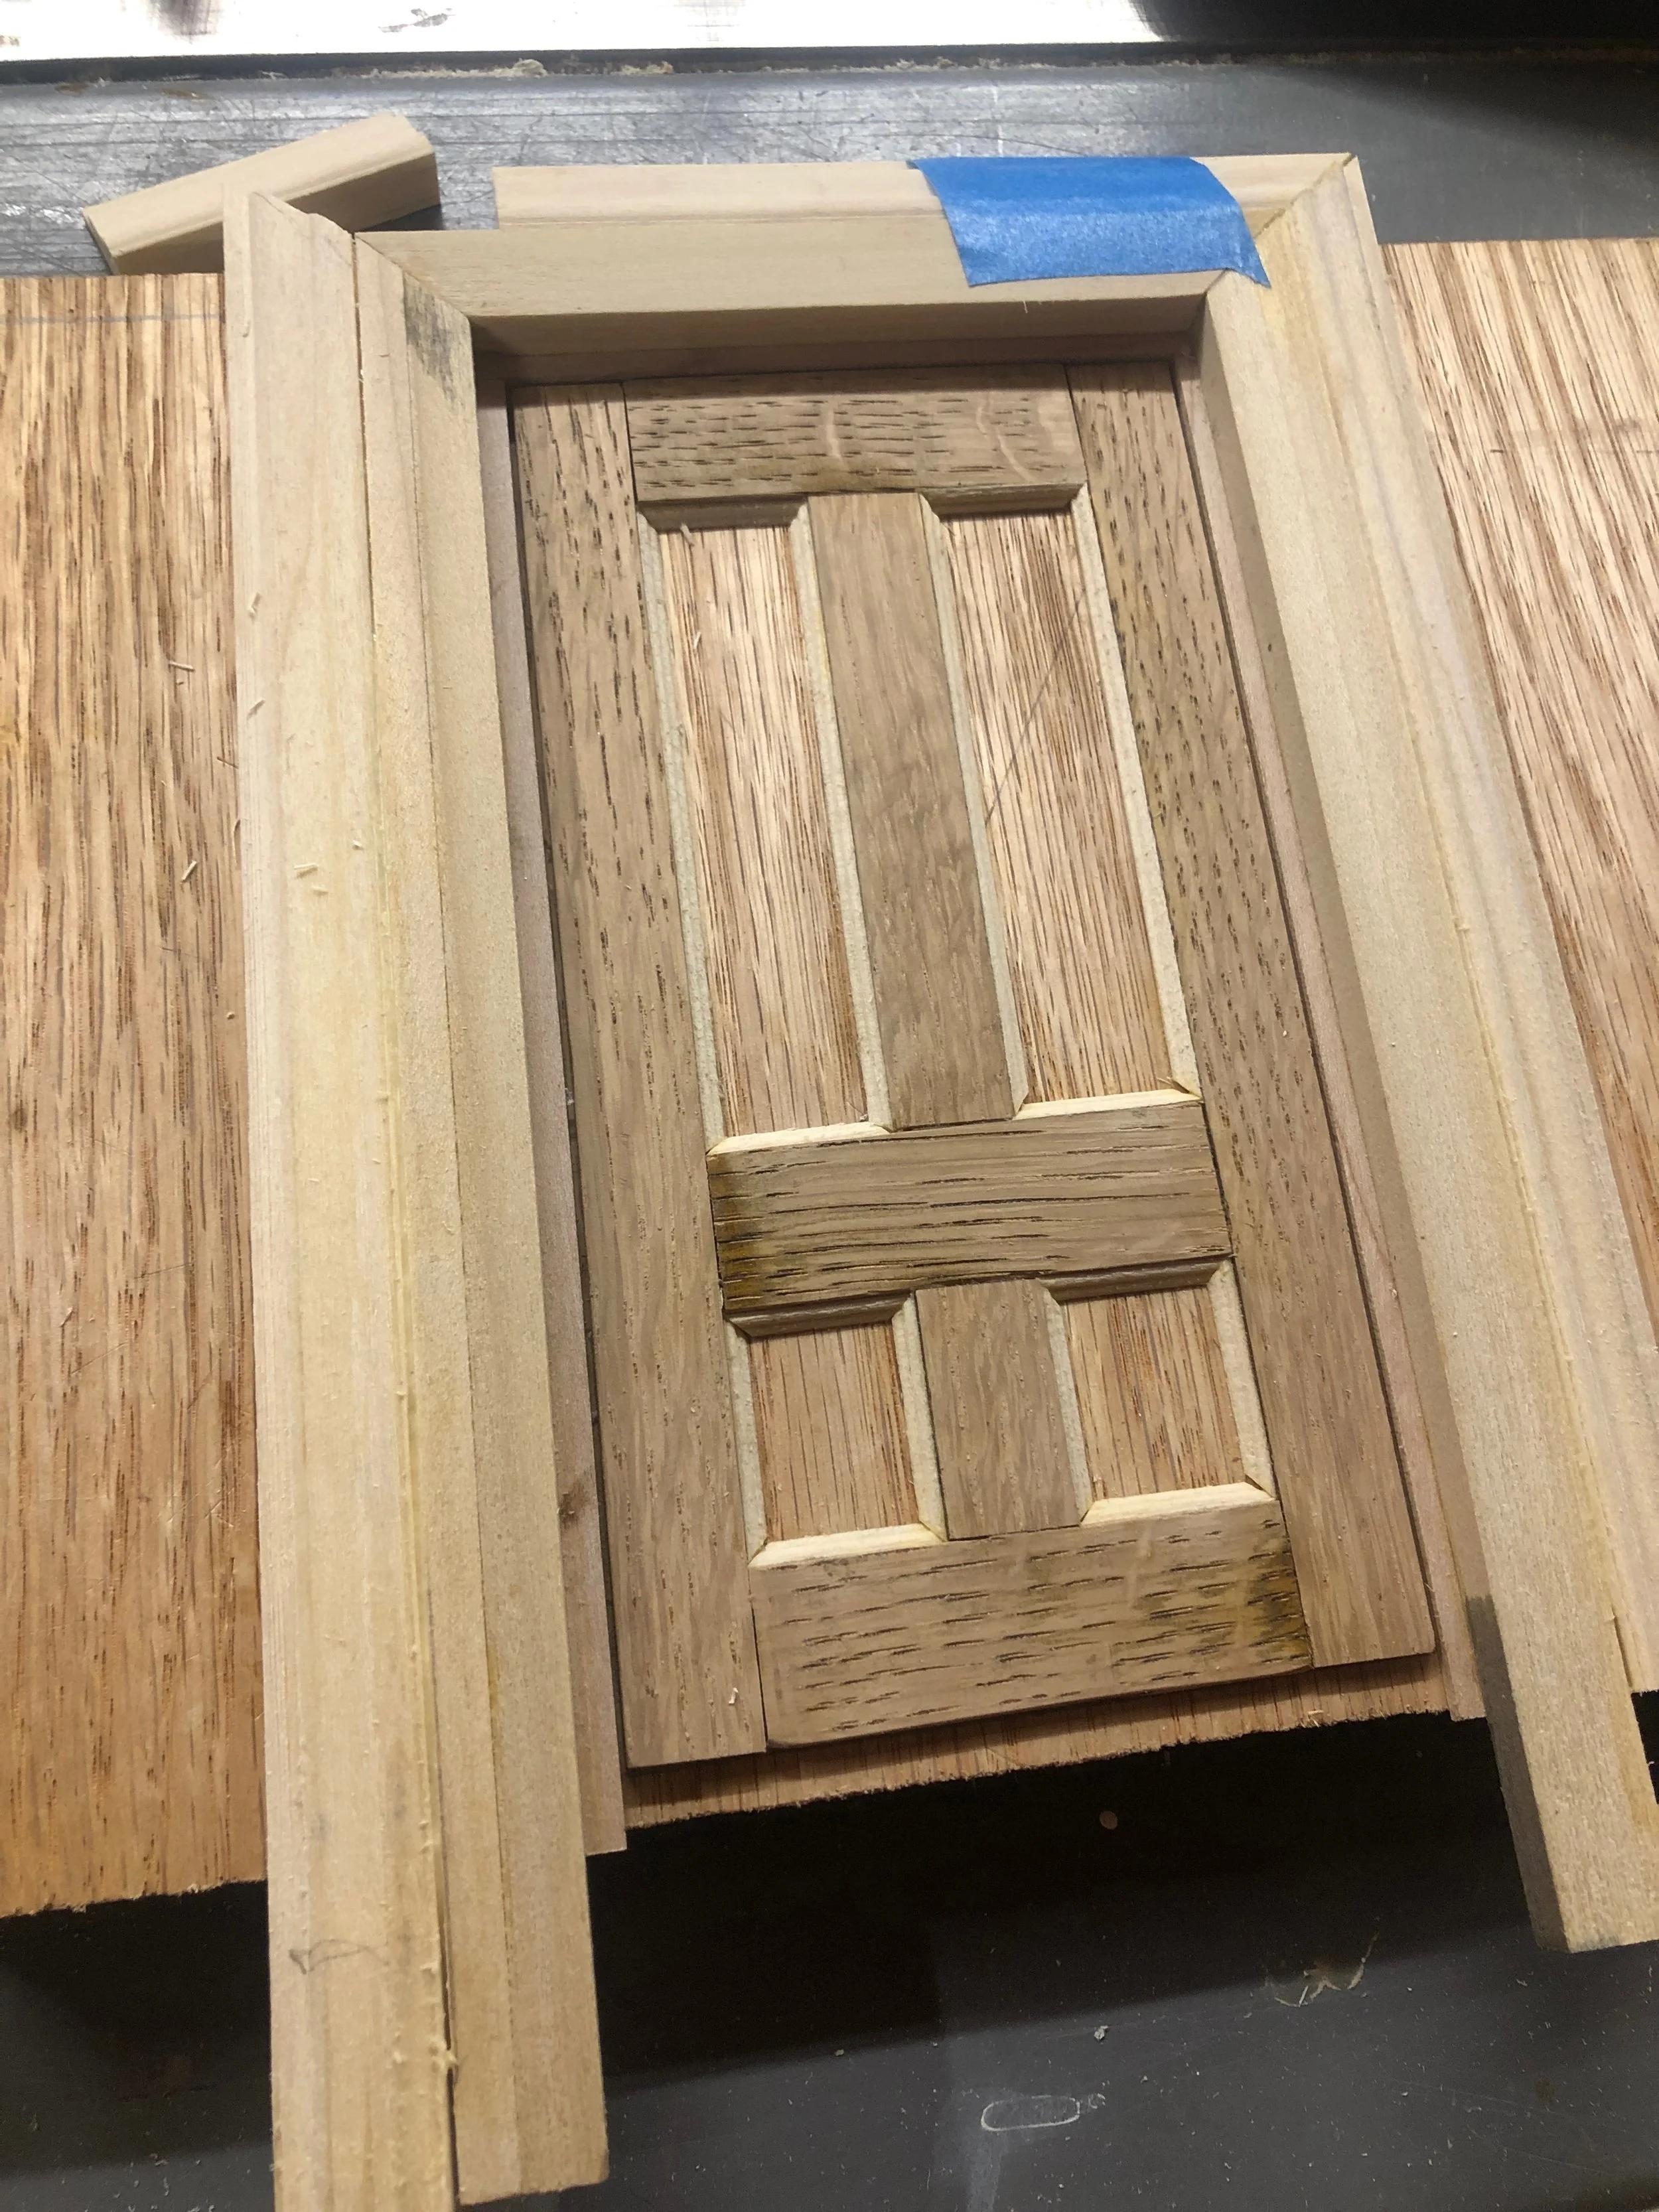
…and, mitering the corners, glue the strips in place in each of the panels of the door. I’ve used oak for its open pore structure, which should make the finished door look more complex and real than if I’d just used a slick material like maple or cardboard. Note I’ve also left gaps where the rails and stiles meet—I want the finished door to really look like it’s made up of fitted pieces.
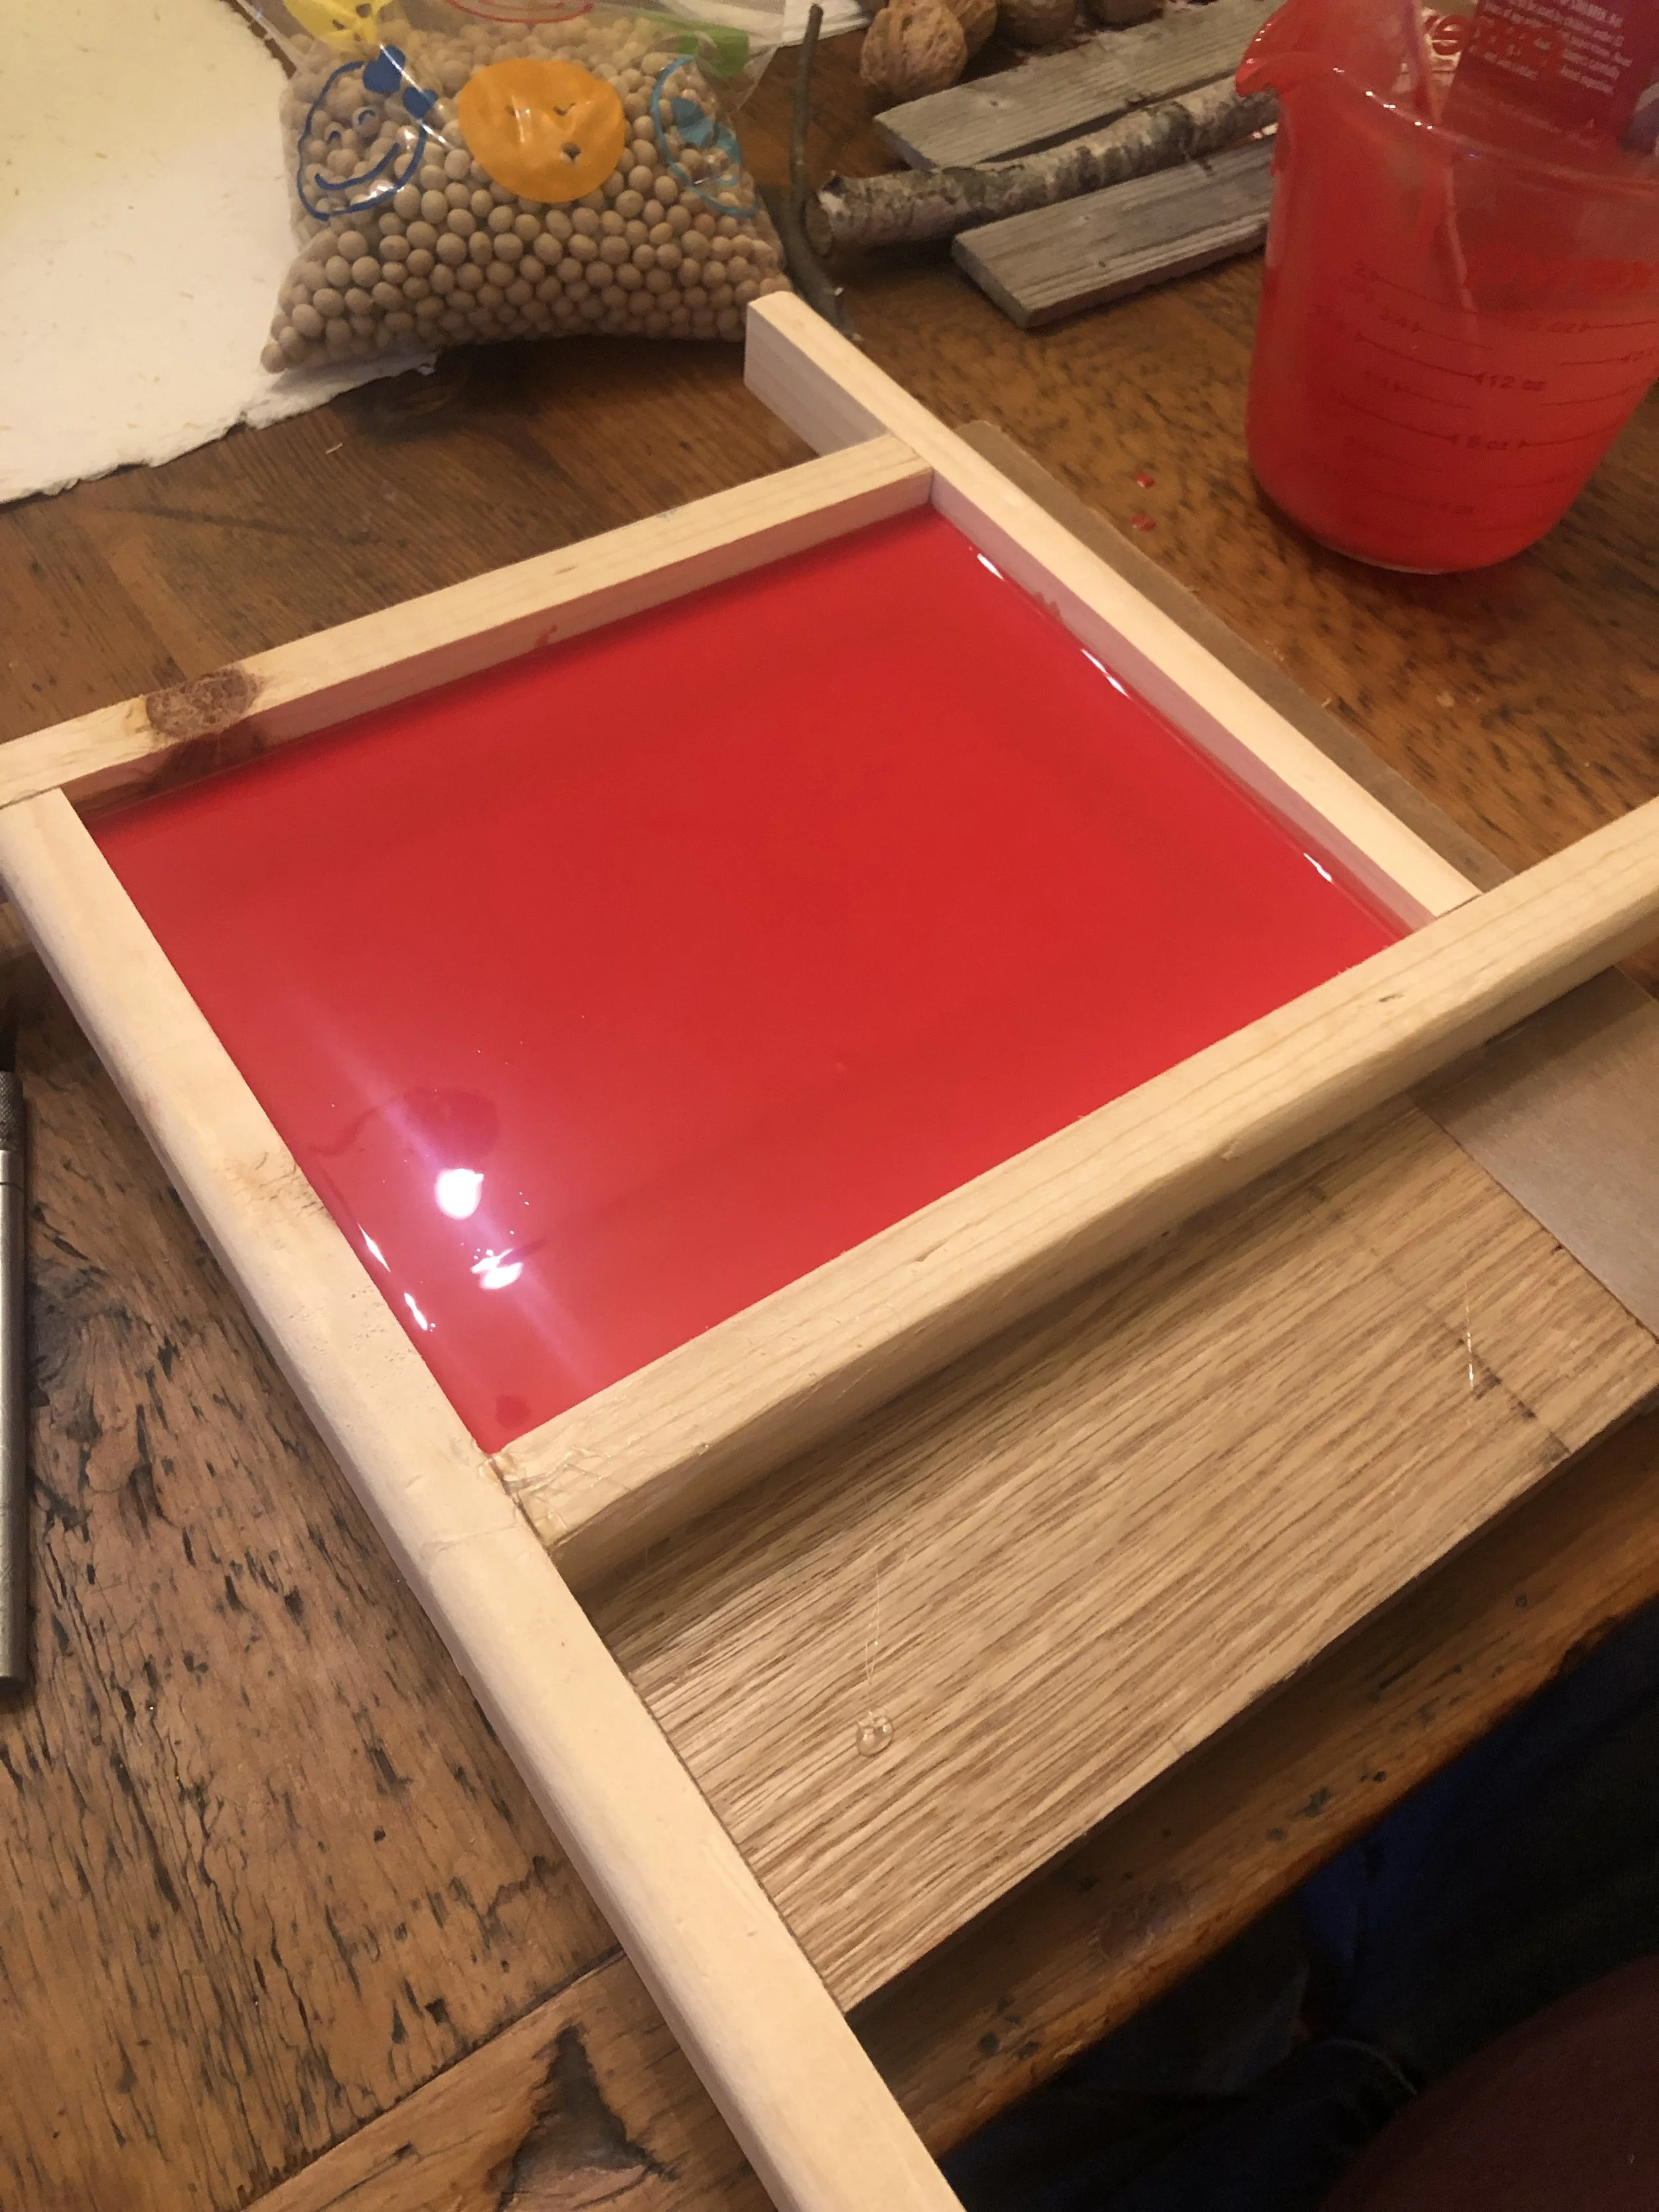
Next, I build a “dam” around the mini door. I don’t want liquid silicone spreading everywhere—and it’s very good at getting into and through tiny cracks. I fill the mold with several pours of red two-part silicone rubber, and let it set.

I break away the dam, and peel off the cured silicone. The mold, on the right, has captured every little pore in the oak!
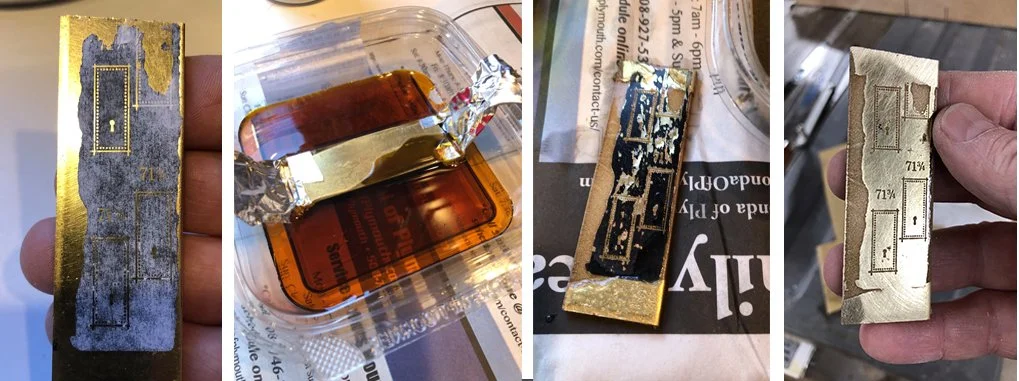
Before I pour the epoxy for the door, I want to make the door’s number plate and doorknob plate. “YouTube University” was fantastic for teaching how to etch metals (I did copper and brass) using ferric chloride (Note: it’s a caustic chemical, and should NOT be used by anyone who’s not going to take all safety precautions seriously).
Below, I’ve taken a laser-printed image—with toner density set to its highest—and ironed it onto a piece of brass stock. Then—GENTLY—washed away the paper, leaving a mask of toner on the brass (left). Then the brass gets suspended upside down in ferric chloride until I’m satisfied with my etch. The third photo shows the brass AFTER etching, and it looks like a real mess. It’s only after a lot of polishing on fine sandpaper that you see the etch detail come out (right.)
Here, I’m laying the trimmed brass pieces on the silicone mold to see what the effect is going to be.
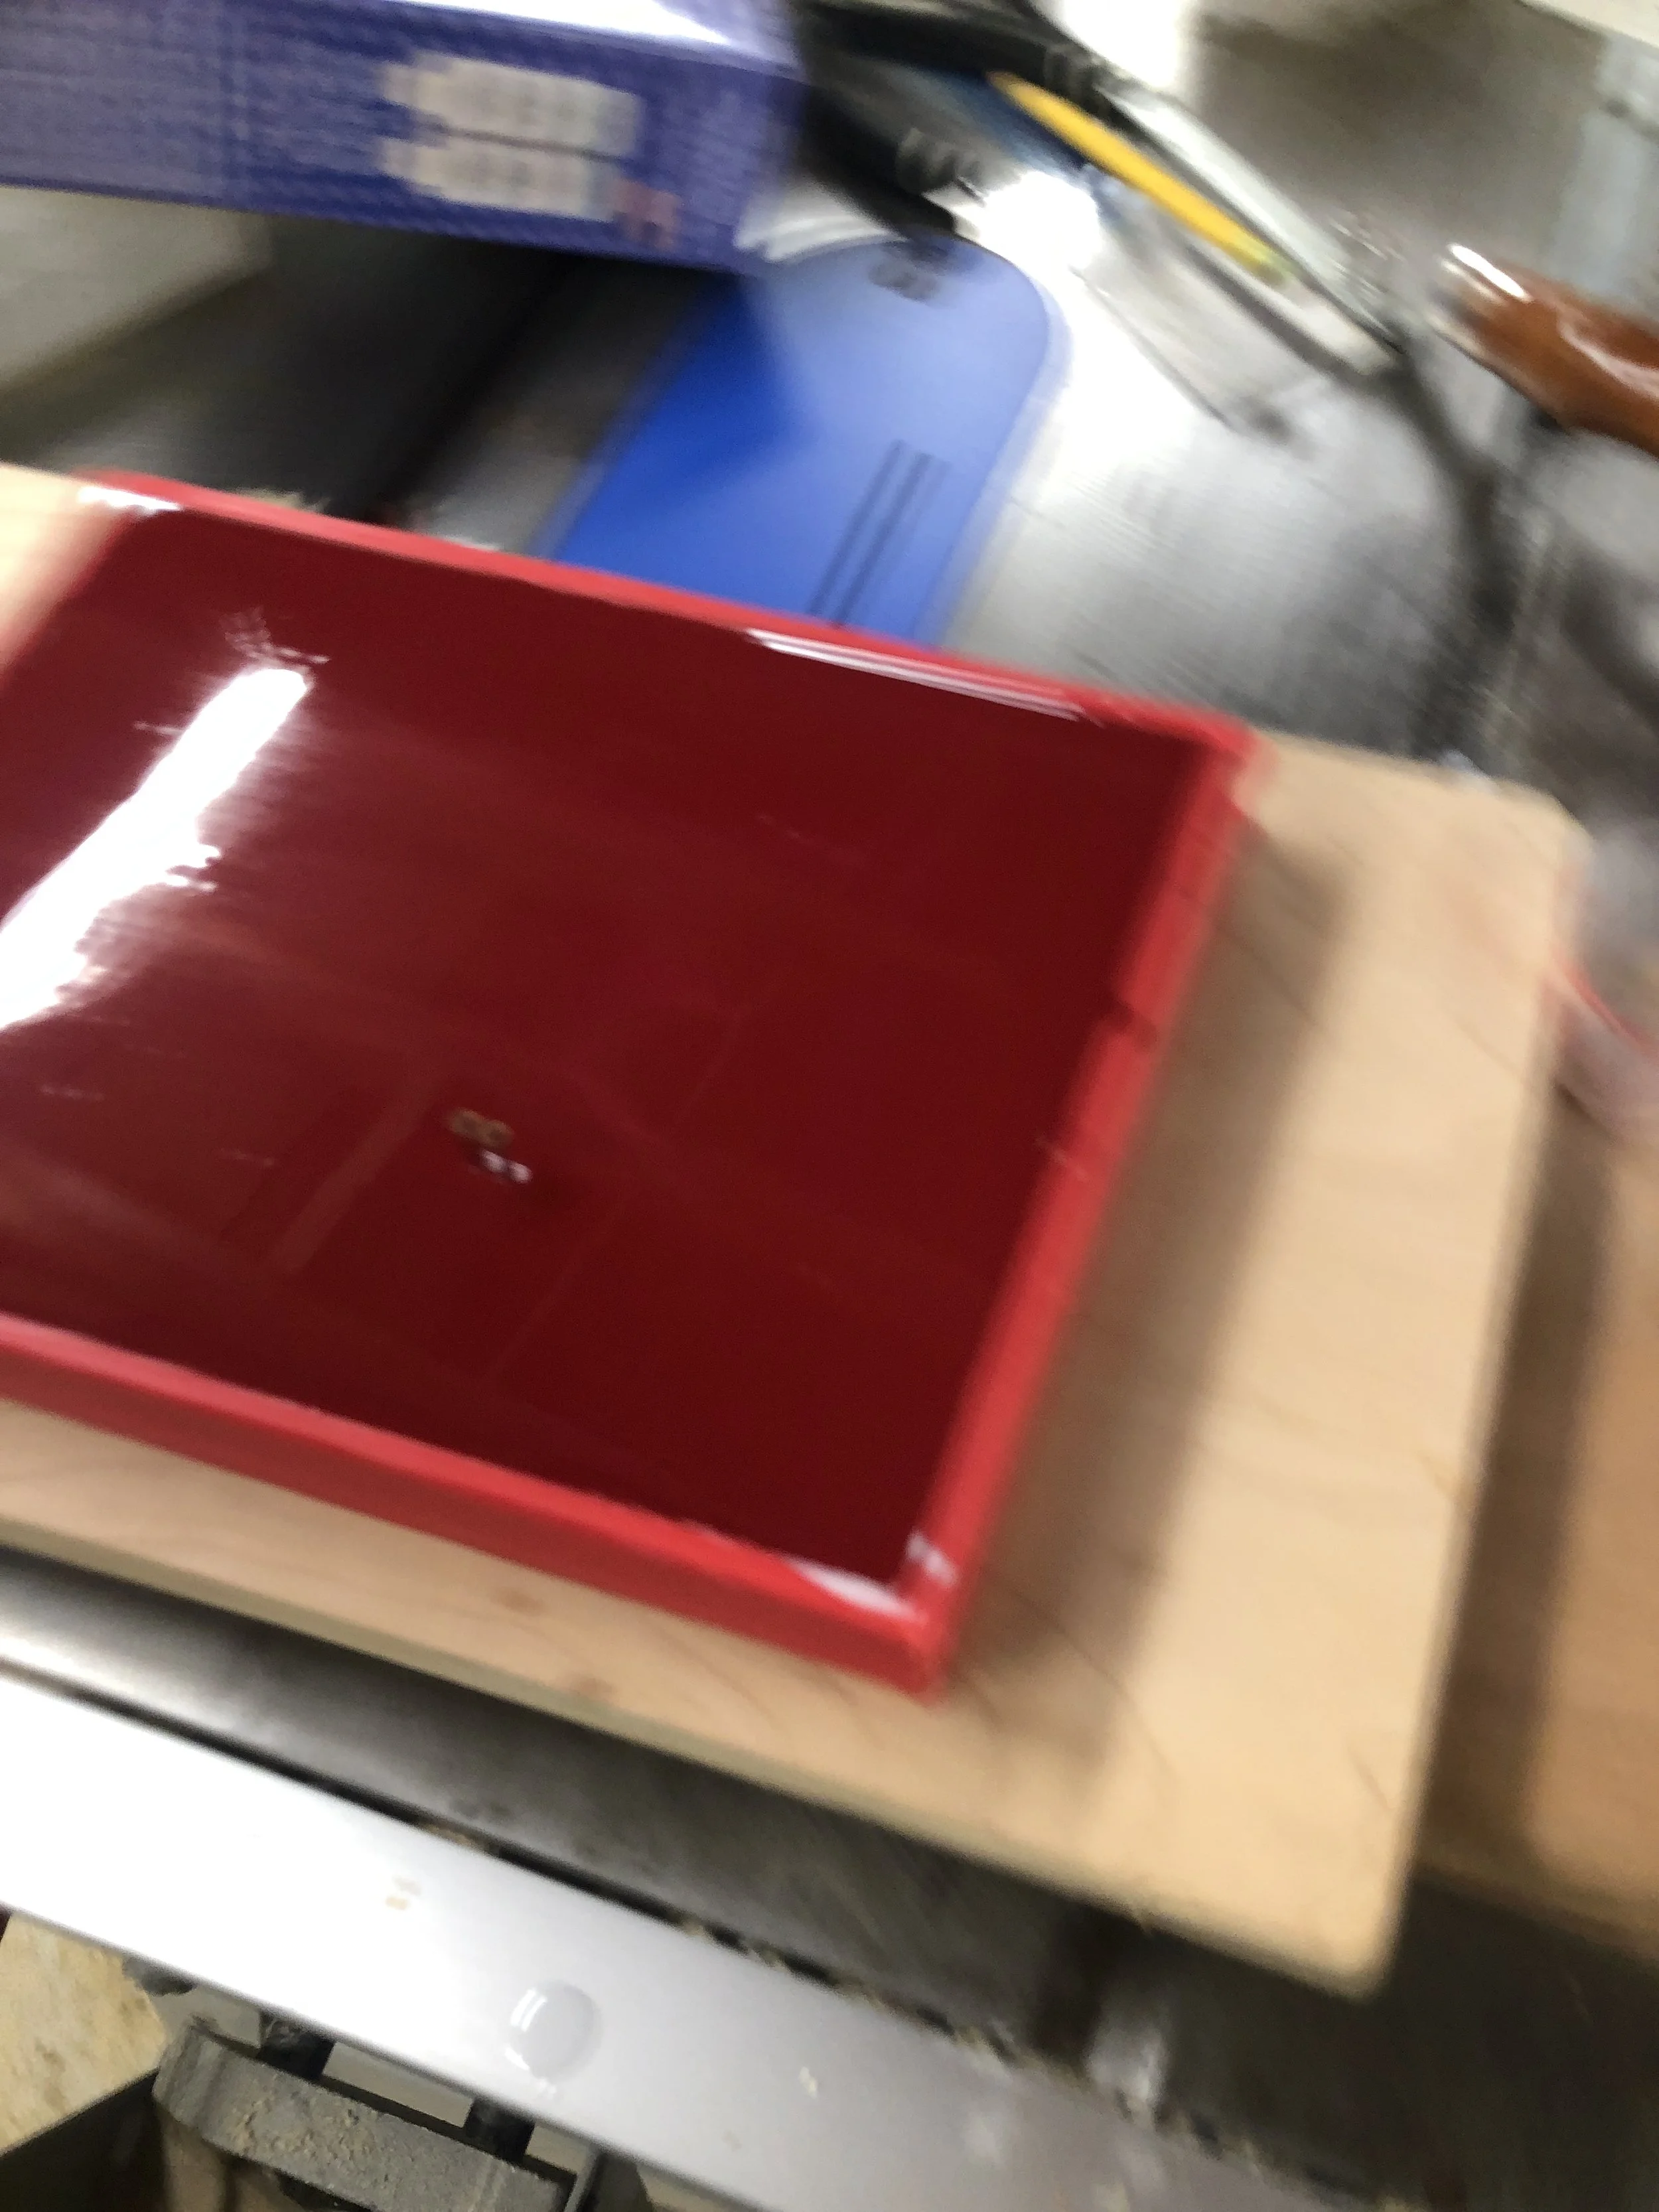
Next, it’s the actual pour. I decided to do the pour in two stages: first, fill the moulding around the door with white-colored epoxy, and once that’s set, fill the door itself with red epoxy, and a little more to lend thickness to the overall piece (terrible photo, but I was paying more attention to whether the pour was going to work than I was to documenting process).
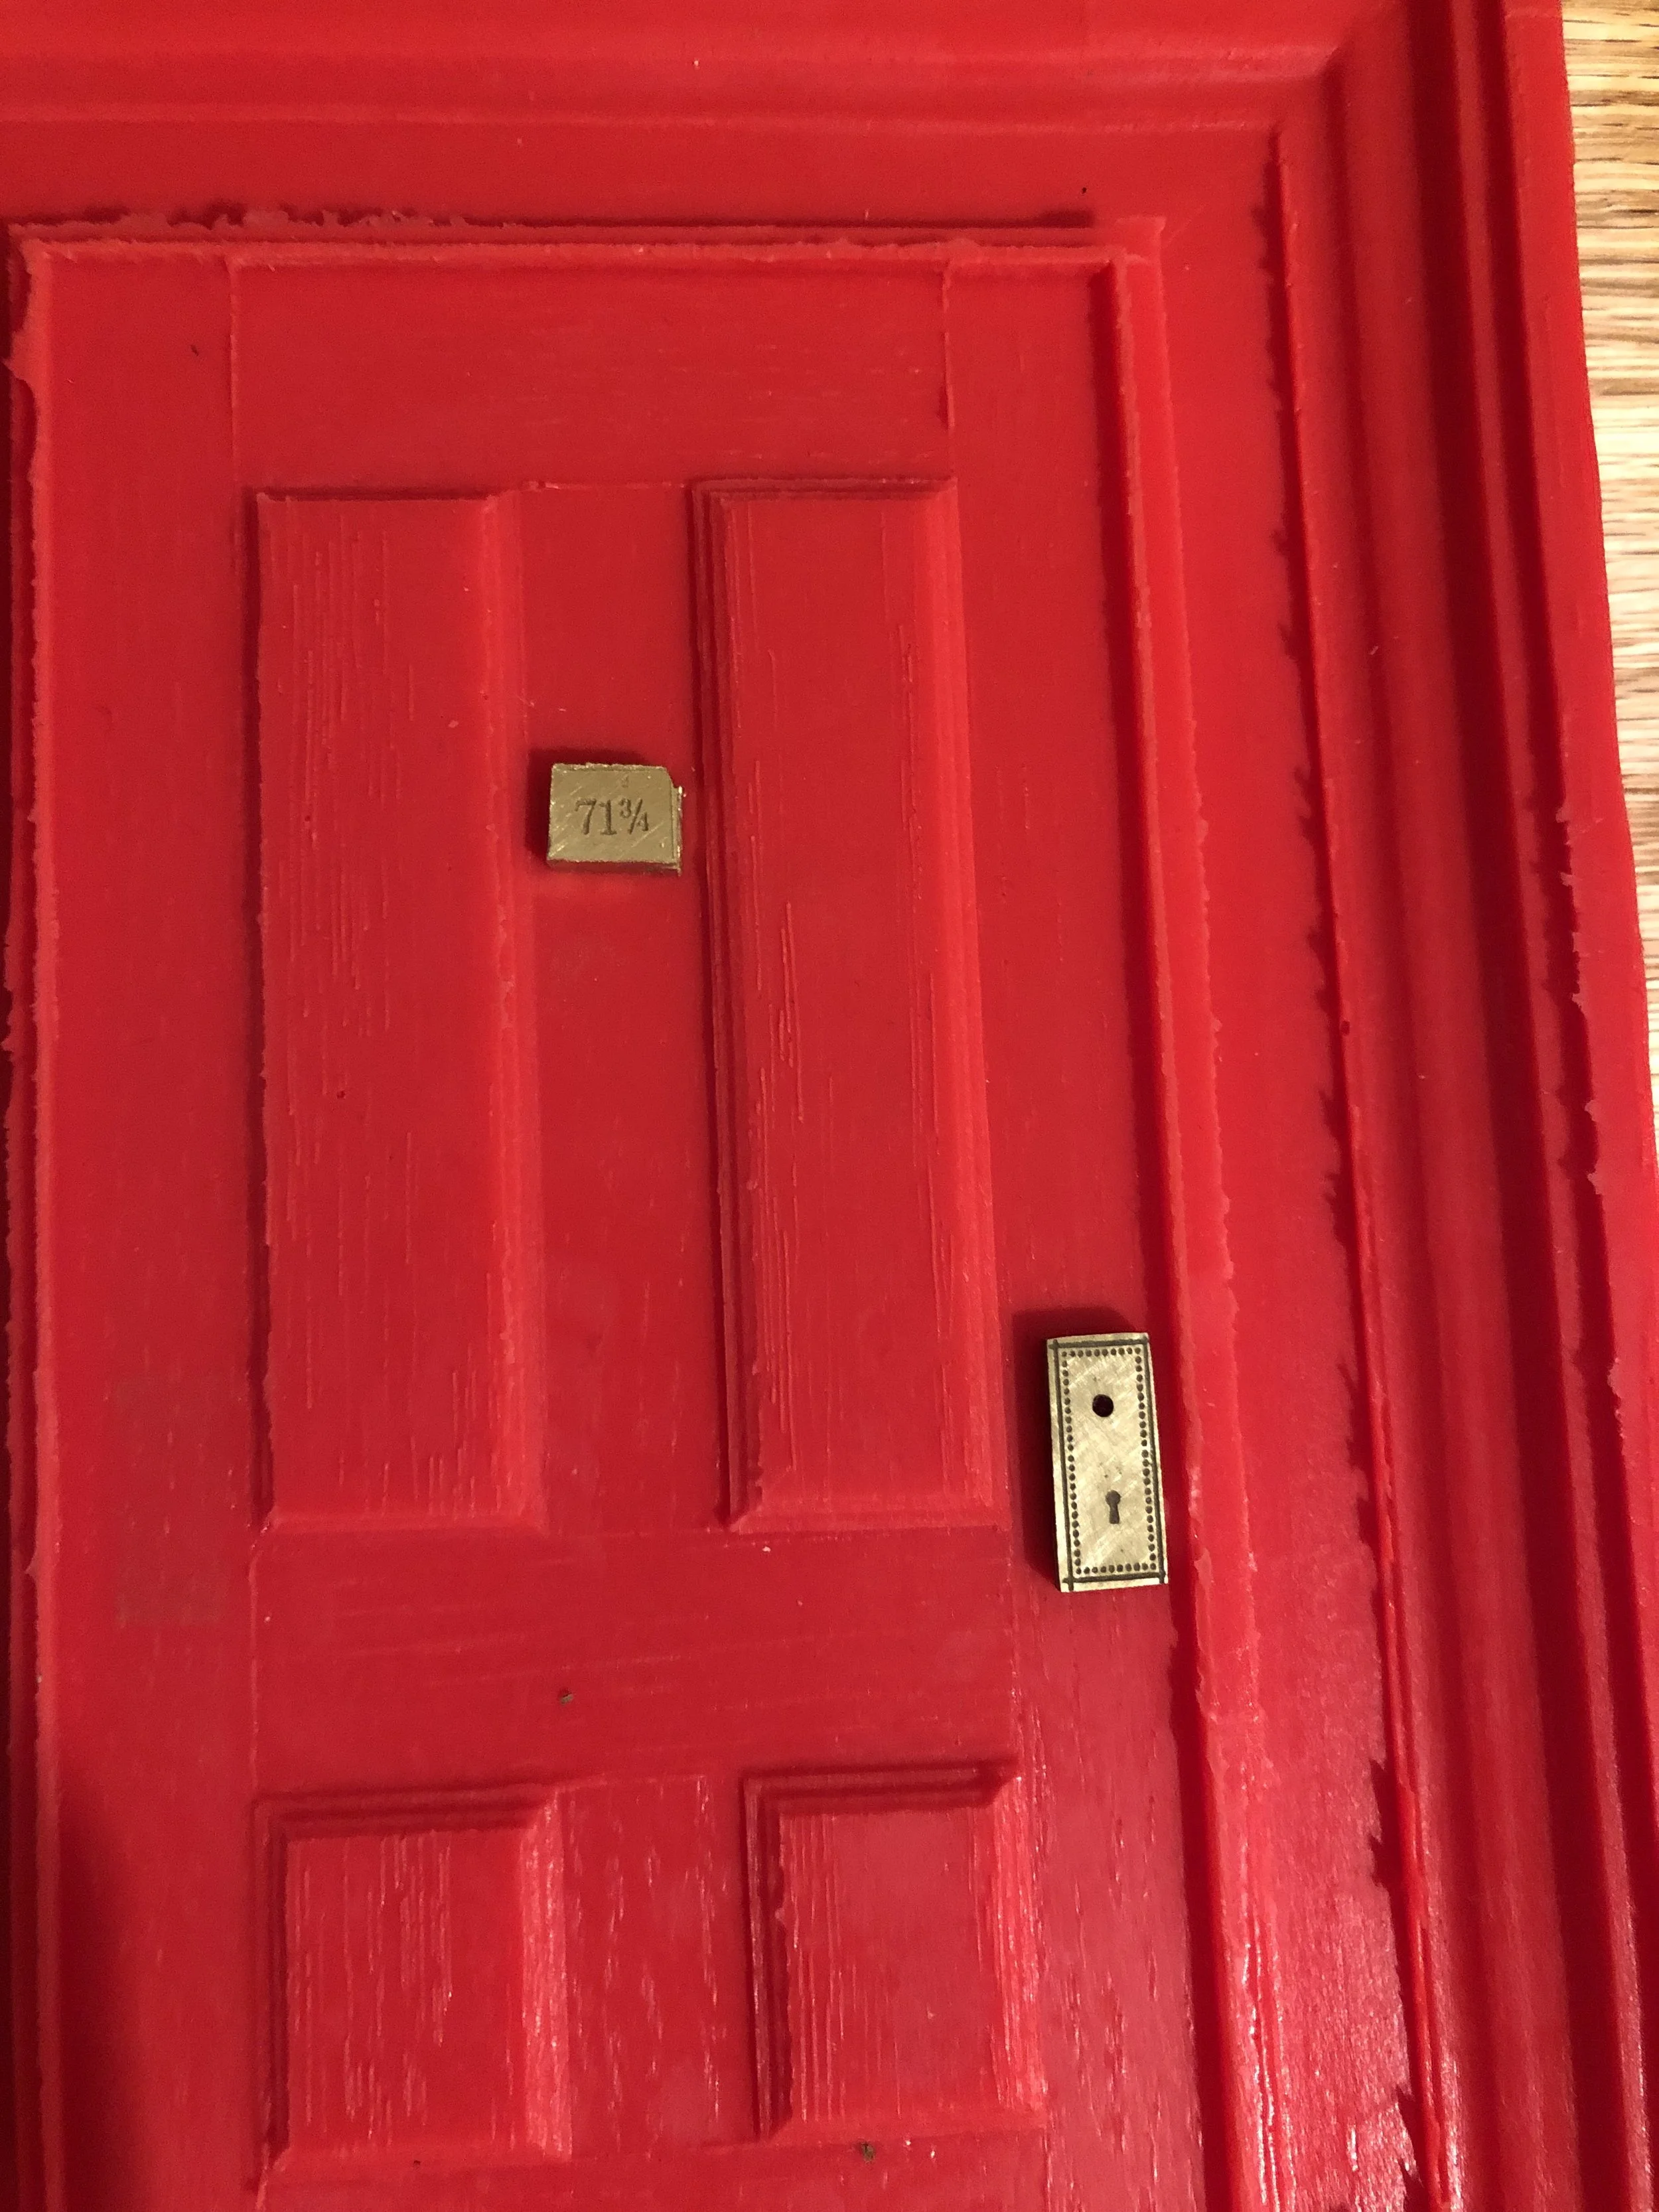
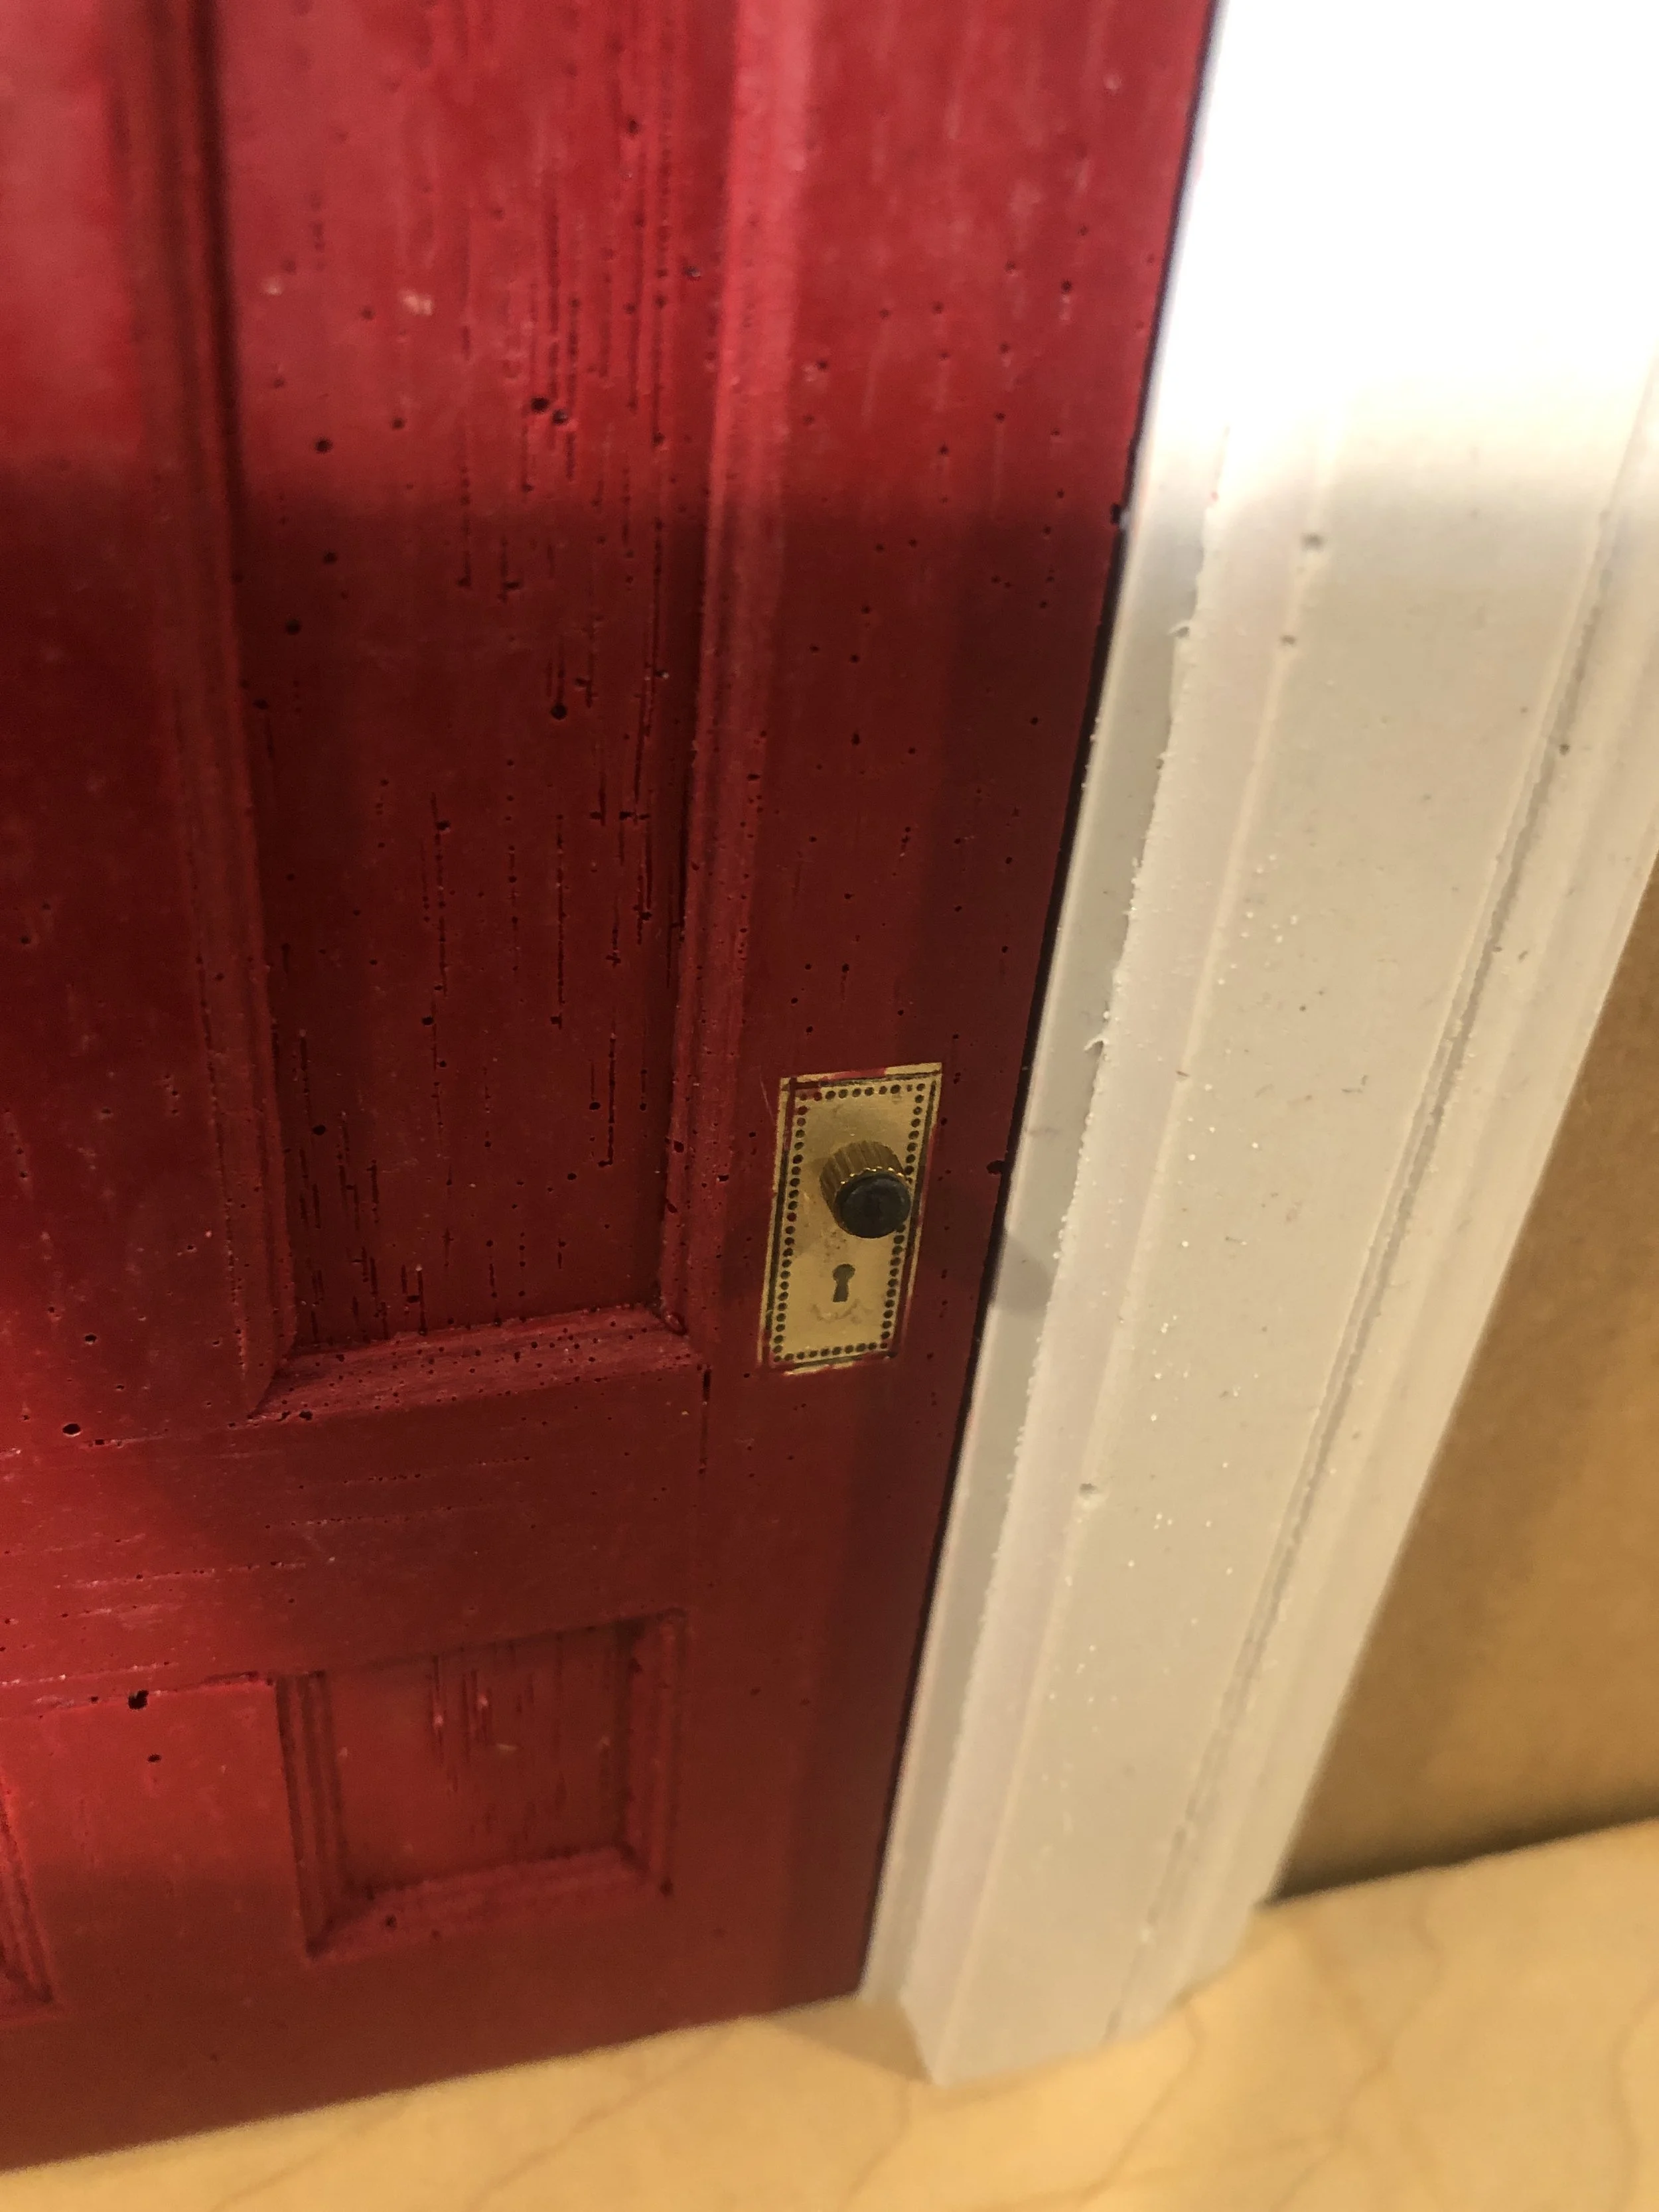
Finally, I peel the door out of the mold. It worked! Looks good, and the brasses, once cleaned up a bit, will look great.
Back to Objects home page